


Short videos are quite popular these days thanks to Instagram and Vine. Both platforms have made this form an important resource and great engagement tool in the hands of bloggers and marketers - with a maximum length of six seconds on Vine and fifteen seconds on Instagram.
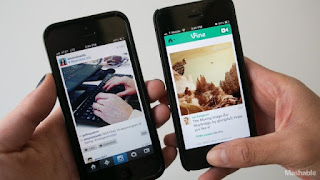
Just to state the (obvious) potentials, Twitter's Vine has 40 million users and Instagram now has 200 million users. Still, if videos are your thing, stats say more people will see them on Vine, since Instagram's primary use was, and still is, photo-sharing (check apps for editing).
 Using both apps to shoot short videos and share them with your blog readers and people who follow you on these social sites is fairly easy. But creating original, interesting, fun and engaging content in this relatively new form and with such strict limitations, at first may be a bit overwhelming. Here are few tips to make it easier:
#1 Get creative. Everything starts with good ideas.
When it comes to Vine and Instagram videos it's not that much about their production quality as it is about having great fun and interesting ideas that you want to share with others. In reality, creative vines are much more intriguing to users than the "good-looking" videos.
Since you only have 6 to 15 seconds, resist the urge to go too deep into your story, but make every second count. You can make several different short videos to promote a post, or create a "how-to" video to showcase your products on Instagram. Vine is perfect to highlight a special offer, new service or product giveaway. Whatever you choose to promote make sure to focus on inspirational and fun content that brings positive emotions in people.
#2 Stabilize with a tripod.
Handycam videos are sometimes good, but in most cases, and particularly if you are not completely certain, it's best to use a tripod when shooting videos with the Instagram and Vine apps to achieve steady and well-balanced shots. There's no app to shine the videos afterwards, so mount your smartphone to the tripod and make sure it's steady. Let the action you want to present happen in front of the camera, instead of you trying to follow it with the phone.
#3 Consider lighting and audio quality.
As with shooting images, you must think of the lighting conditions before you start recording a video. There are no balance commands on both apps, so it's much better if you take care of this ahead. Even opened blinds inside a house or a simple lamp can dramatically alter your shots.
People can watch your vines without the sound, but if used properly good quality audio is one very important component of the message you are sending, your story, and the mood you want to create. Since the mics on phones usually are not of the highest quality it is safer to avoid crowded places and background noises when shooting.
#4 Know the time and frame limits.
You have only six seconds on Vine, and fifteen on Instagram, to tell your bite-size story. This means you must carefully plan each shot of your videos so you won't run out of time, and viewers can also understand your message correctly. Both apps only have square frames, so when shooting your videos consider your standpoint and where the object is located within the grid.
#5 What about looping videos?
On Vine there's no choice - all videos loop by default. They are best made with a tripod, in a clear setting, shooting one image at the end of another to tell your story, before you get ready to move on with some more complex techniques. Looping videos can also be used on Instagram, even though that's not your only option on the site.
#6 Don't forget to add a smart and witty caption.
Including smart and funny captions and comments with your short videos will intrigue Vine and Instagram followers to check out your profiles and visit your blog. Be careful not to reveal too much so they won't need to come to your site for more. Also, think how the video will look in other social sites streams if you are planning to share it.
So how about you… Do you like these short-form videos? Can you see them as part of your blog's promotional efforts on social media? Tell us your tips if you are already shooting vines and Instagram videos.
Just to state the (obvious) potentials, Twitter's Vine has 40 million users and Instagram now has 200 million users. Still, if videos are your thing, stats say more people will see them on Vine, since Instagram's primary use was, and still is, photo-sharing (check apps for editing).
 Using both apps to shoot short videos and share them with your blog readers and people who follow you on these social sites is fairly easy. But creating original, interesting, fun and engaging content in this relatively new form and with such strict limitations, at first may be a bit overwhelming. Here are few tips to make it easier:
#1 Get creative. Everything starts with good ideas.
When it comes to Vine and Instagram videos it's not that much about their production quality as it is about having great fun and interesting ideas that you want to share with others. In reality, creative vines are much more intriguing to users than the "good-looking" videos.
Since you only have 6 to 15 seconds, resist the urge to go too deep into your story, but make every second count. You can make several different short videos to promote a post, or create a "how-to" video to showcase your products on Instagram. Vine is perfect to highlight a special offer, new service or product giveaway. Whatever you choose to promote make sure to focus on inspirational and fun content that brings positive emotions in people.
#2 Stabilize with a tripod.
Handycam videos are sometimes good, but in most cases, and particularly if you are not completely certain, it's best to use a tripod when shooting videos with the Instagram and Vine apps to achieve steady and well-balanced shots. There's no app to shine the videos afterwards, so mount your smartphone to the tripod and make sure it's steady. Let the action you want to present happen in front of the camera, instead of you trying to follow it with the phone.
#3 Consider lighting and audio quality.
As with shooting images, you must think of the lighting conditions before you start recording a video. There are no balance commands on both apps, so it's much better if you take care of this ahead. Even opened blinds inside a house or a simple lamp can dramatically alter your shots.

People can watch your vines without the sound, but if used properly good quality audio is one very important component of the message you are sending, your story, and the mood you want to create. Since the mics on phones usually are not of the highest quality it is safer to avoid crowded places and background noises when shooting.
#4 Know the time and frame limits.
You have only six seconds on Vine, and fifteen on Instagram, to tell your bite-size story. This means you must carefully plan each shot of your videos so you won't run out of time, and viewers can also understand your message correctly. Both apps only have square frames, so when shooting your videos consider your standpoint and where the object is located within the grid.
#5 What about looping videos?
On Vine there's no choice - all videos loop by default. They are best made with a tripod, in a clear setting, shooting one image at the end of another to tell your story, before you get ready to move on with some more complex techniques. Looping videos can also be used on Instagram, even though that's not your only option on the site.
#6 Don't forget to add a smart and witty caption.
Including smart and funny captions and comments with your short videos will intrigue Vine and Instagram followers to check out your profiles and visit your blog. Be careful not to reveal too much so they won't need to come to your site for more. Also, think how the video will look in other social sites streams if you are planning to share it.
So how about you… Do you like these short-form videos? Can you see them as part of your blog's promotional efforts on social media? Tell us your tips if you are already shooting vines and Instagram videos.